October 2017 was a big moment for iNU Solutions, after 4 years and a lot of reshuffling we moved out of my attic and into our very own office space. This is part of the continued progress we are making to grow the business.
Think
I visited several potential locations over a period of what seemed like months, some were good, some were not as advertised, but none of them really struck me as the “right” location. As I mentioned in a previous blog post, choosing your office location is something that you have total control over and is very important.
After much searching we finally found a shared office building called “Het Brouwershuys”, located just outside the city centre of Rotterdam, in Crooswijk. Formally a brewery, it is now home to a wide variety of small businesses, such as accountants, architects and even a psychologist.
So, we now had this big empty area, what to do with it…
Plan
Seeing as the building has an industrial feel to it, with big open spaces, exposed pipes, bare brick & wood walls and concrete floors, it didn’t seem right to fill the space with shiny new IKEA office furniture. I had a very good idea of how I wanted things to look and after searching around for suitable stuff I realised that I would have to compromise too many ideas. So instead of buying “off the shelf” I decided to build the desk area myself.

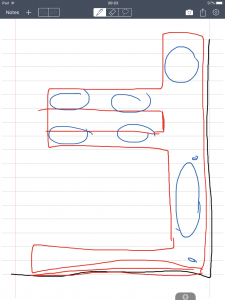
The basic concept that I wanted to achieve was to have 2 work areas, one for my iMac to sit for the “business” side of things and the other for my laptop to do the “real work”. In the middle Iwanted 4 “project workstations” that allowed hardware to be placed away from the 2 main work areas. This allows hardware to be left out and connected, which saves setup time and allows me to easily change between projects.
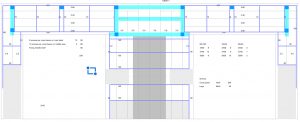
Queue lots of random sketches, scale drawings, “to buy” lists, tutting and the occasional swear word! After a few days of planning I had a very good idea of what I needed to do, in what order I needed to do it and what materials I would need.
Do
After collecting the keys on Monday 16 October, I immediately started getting things organised. The car was filled with tools from the shed, deliveries were scheduled and teabags were packed!
The wood was ordered online, the fixings purchased from a local builders merchants and the shelving units ordered from Praxis (a Dutch DIY/Home Improvement chain). I had almost everything delivered as it is paid parking at the front of the office building, seeing as I already pay a fortune in road tax I refuse to pay even more for the privilege of parking my car on the side of a road.

The wood was delivered on the Tuesday, and needed to be carried around 100 meters, taken up 3 flights of stairs and then carried a further 30 meters. All together there were 55 individual pieces, minimum length of 3 meters and in total weighed around 290KGs. This is why I packed the teabags!
After the wood had arrived I could really get stuck in and over the next 3 days I created the whole desk area, complete with electrical sockets, Ethernet connections and cablemanagement. I wanted to create a “wire free” work space, so this took quite some thought as to where cables should be routed to avoid being seen.
The whole wood surface was sanded down and treated with a very good protective oil from Rubio called Monocoat. The 5% white colour makes the wood a bit lighter, but does not cover any of the natural texture or patterns. This isn’t in the video as I thought that the sanding would created a lot of dust and I didn’t want to damage the camera. To my surprise however the vacuum on the sander worked really well and there was hardly any dust in the air, it was a small victory but sometimes you just gotta take it!
As could be expected, the construction created a lot of noise. Luckily the area of the building I am in is newly refurbished and there was only one other company already here, on the opposite side of the open plan space.
To avoid further disturbance to the other tenants we moved all the office stuff in on Saturday and Sunday, plus it is free parking at the weekend! We spent some time positioning things to make best use of the space and to ensure all the cables could be hidden away.
Results
It may sound very big headed of me but I am very happy with the finished office, it is even better than I ever expected it to be. Every time I open the door and see the nice big desk it makes me smile, partly because it looks good but mainly because I know how much effort I put in to building it!
The freedom of being able to leave things as they are at the end of the day is great, not having to worry about little hands pressing buttons or drawing on contracts! Everything now has its place and stays there until needed, I even purchased a brand new hole punch!
I really love the wooden desk top, yes it’s not perfectly flat, yes it has some holes in it, but the way it looks and feels is amazing. The natural texture, the patterns, the way it creaks a little when I lean on it, and the ruggedness of it really complements the building. As time passes it will change colour, get new dents, stains and scratches, it seems like it’s almost still alive in my office.
As a consequence we now have an empty room in the house, I have been in there for so long it is almost like we have had a new extension built! Just need to decide what to do with the space now…
Overall I consider this to be a great success and something I thoroughly enjoyed doing. If you are even just a little bit “handy” I would highly recommend trying to do something like this yourself, you get exactly what you want and can make use of the entire space. As I found this quite satisfying I have made a deal with myself, that every time I move into a new office I will build my own desk.
Just as a disclaimer, there is no sponsorship of any kind in the video or this blog post. Any tools used were already owned by myself, any products used were chosen as they were deemed to be the best for the task.


